These are the instructions given out for the chain maille classes I teach. I strive to provide the most comprehensive instructions that aren’t unnecessarily long.
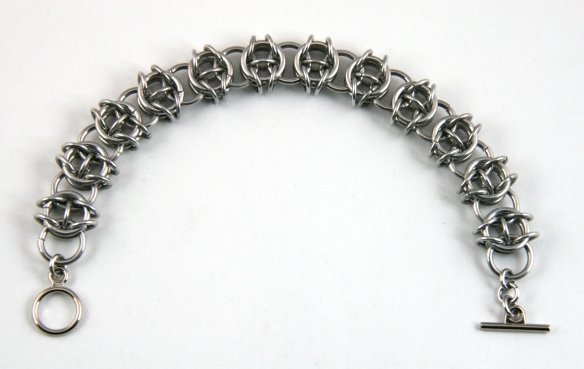
Celtic Visions forms a great chain for bracelets and necklace, and modifications to the weave, such as joining the ends together and adding certain rings, can create different things from stars, referred to as Celtic Stars, to complicated sheets of maille. Celtic Visions looks a lot like Celtic Knot work, hence the name! These instructions are geared toward a beginner. The rings used in these instructions are 18 gauge (.048″), 3/16″ ID (Inner Diameter), and 16 gauge (.062″), 5/16″ ID bright aluminum rings, so the AR’s used are approximately 4.1 and 5.2 after springback. To visit my etsy shop, click here: metalandmineral.etsy.com. Enjoy!
Step 1:
To start the weave, close two small rings and slip them onto an open large ring, and close it.
Step 2:
Close three small rings and slip them onto an open large ring. Slip that large ring onto one of the small rings from the previous step, and then close it.
Step 3:
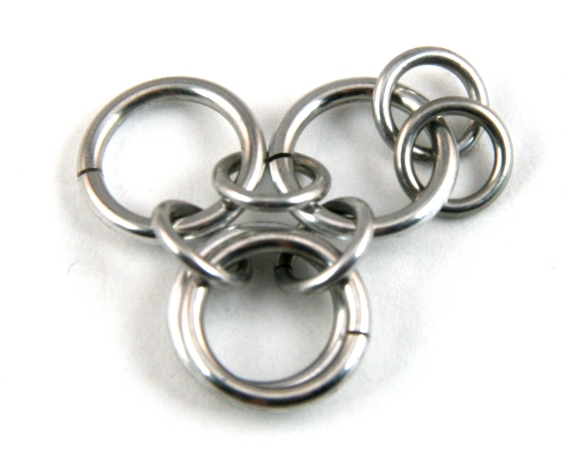
Lay the pattern as shown, with the two bottom-most rings bottoms facing each other. Another way to look at it is that the rings are bowing out, away from each other. Open two large rings and slip one through the two bowed rings at the bottom, going up through one, and down through the other. Repeat with the second ring.
When done, it should look like this.
Step 4:
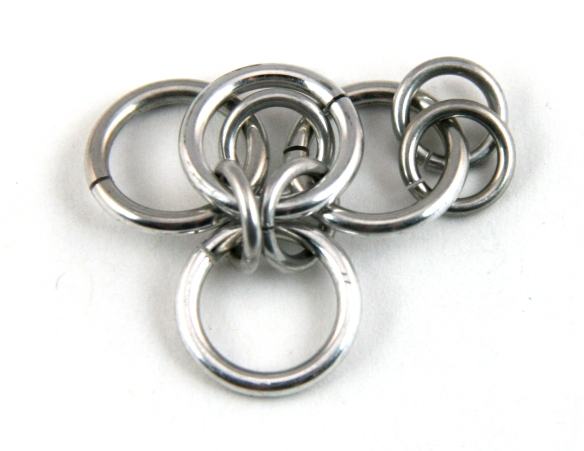
Be sure the weave is laying as shown in the previous picture. Take the top large ring of the two that were just added, and flip it over so that it is laying on top, as shown below. The small ring will appear as if it is “trapped” inside the larger ring.
Now flip the other large ring under, so that it looks as shown below.
Step 5:
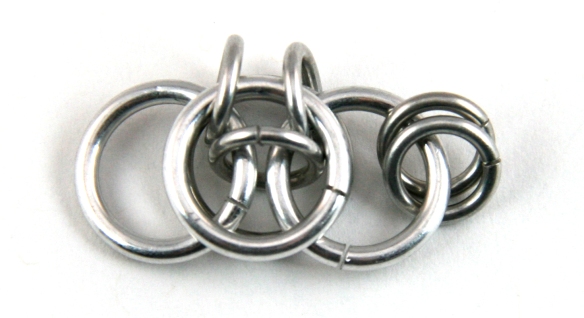
Open two small rings. Arrange the weave as shown below or the previous step*. Take the two open rings and link them through three of the large rings that are stacked together in a “sandwich”, one to each side. You are duplicating the pattern that you see at the top of the weave, in order to form a diamond, or “H” shape.
If done correctly it should look like this.
Step 6:
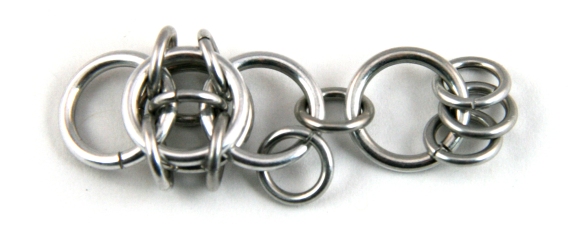
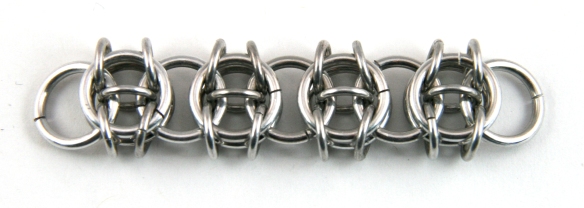
Now that you have completed one unit, expanding is pretty simple. Simply repeat Steps 2 through 5 as detailed. Below is a set of pictures displaying those steps carried out.
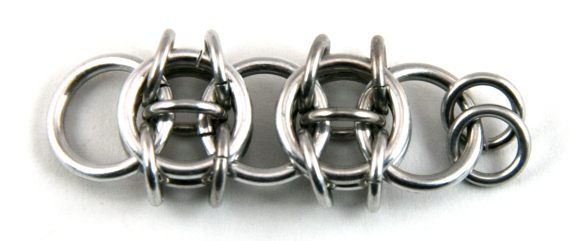
Step 5 repeated. Now two units long. Pair of small rings left are for continued expansion of the chain.
To end the chain, simply close only 1 small ring and then join the large ring. This will make it so there is not a pair of rings left like shown above.
* The rotation pictured is not necessary, do not be thrown off by it
© Metal and Mineral







I am continuously searching online for articles that can aid me. Thx!
Have completely fallen in love with your site–cannot express strongly enough my thanks for the extensive efforts you’ve gone to to add your tutorials to this website–they are excellent and intriguing!